|
|
|
|||||

Photographs of the night sky have always fascinated and intrigued viewers…but for many years the only way to see photos of the night sky was to wait for NASA to publish them in National Geographic, after shooting them with the Hubble Telescope. With the advancement of technology over the past 5-7 years, it has now become possible for the regular photographer to capture impressive images of the night sky using a regular old DSLR.
A group of 10 eager astro-photographers met Stephen Oachs and I in our San Jose Studio on a warm Saturday evening to head out to California’s newest National Park, Pinnacles NP to see the night sky and come away with some amazing images and education.
After our customary orientation, our excited photographers loaded up into Apcab 1 and we set off for the foothills and out to the craggy rock spires of Pinnacles. The scenery once we leave the city is sparse, but the way the golden light of sunset plays on the multiple layers of hillside and foliage is quite beautiful…eventually this pastoral farmland gives way to the hills and rocks of the national park, and our final destination for the night.
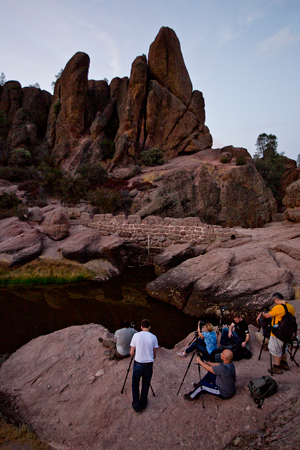
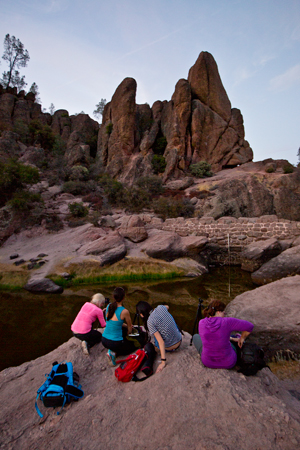
Great photography doesn’t give up the goods so easily…which means there is a hike involved in getting to our final spot for the night; uphill, through caves, over rocks, and a mile later up on top of the mountain overlooking several impressive rock spires, and a cool reflective pool. The sunset was winding down so while we waited for dark, everyone grabbed some shots of the beautiful light.
The sun drops fast, and we loose light with it…so one of our first priorities for shooting at night is to get our compositions and focus locked in while we can still see. Stephen and I helped the group get their compositions decided, and their cameras in the right spot, focused and ready for the shooting to come. Many folks have intervalometers to help them with their shooting, but also have a tough time figuring out how to use them…so while we wait for the stars to shine we will go through those steps so that they can be utilized.
While we wait for the maximum darkness we go over some settings to help students get some shots of the pinpoint stars that are beginning to dot the night sky. IN addition to the darkness of the sky, we’re also waiting for our moon to rise…the moon will act as our light to paint the surface of our subject for the night.
Once our moon is painting our pinnacles, it’s time to get the show on the road. Stephen and I help the students take a few last-minute test shots to dial in their settings for our 5-minute long star trail shots…our goal is to take a series of 10 of these shots so we can layer them together in the next day’s post processing class back at the studio.
Everyone’s shots are great, and thanks to our testing ahead of time…we all settle into shots around f7.1 ISO 100-400 for 5 minutes…and then the waiting begins for all of the shots to finish. While we wait everyone talks, snacks, and jokes…it’s generally a really fun and relaxing time.
When all 10 shots have finished, the clouds in the sky are fantastic…and we go back to doing some pinpoint stars. Clouds while not ideal for star trails, can really help make a dynamic image with the pinpoint stars dotted throughout.
The class eagerly shoots away until about 10:00pm then it’s time to hit the dark trail and head back to the van and ultimately back to the studio…where everyone will depart for a few hours of much needed rest before we meet again to learn how to take the images we’ve captured and make sure they look their best.
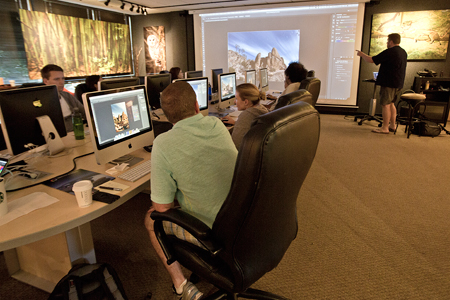
Processing is easily one of the most important parts of digital photography, and it’s even more important with night work. It’s where you layer the star trail shots, and work blending modes, as well as fine-tune the color, contrast and other issues night images often have. Because of some intense clouds passing through the area during our star trails we opt to not blend the full 10 exposures in favor of finding 3-4 in a row where the clouds are not as bad and then work on those. Stephen shows the group how to set the opacity for each section of star trail to create a sense of movement in the trails…it’s a fascinating technique that gives a little extra oompf to shorter star trails.
Once the trails are layered, we help them with the levels, colors, and using a burn and dodge layer to bring out the best of the shots…SO many nice images were on those screens…mother nature really delivered.
After everyone has processed a shot of the trails and a pinpoint shot, we go over how to save the files as PSD files to preserve all the layers, and how to flatten and save them for print as well. There’s a lot to go over, and the class handled it beautifully.
The class hiked out, did what was needed to get the best of the nights’ offering in terms of photography, and spent a morning in the classroom learning how to make them shine (pun intended)…they all left with printable images…the only thing they need to do now is take the printing class and get them put on paper!
Until Next Time,
Brian, Stephen, and the rest of the Aperture Academy team!
If you'd like to join us at one of our workshops, you can find the schedule/sign up here.
See more action photos below the comments!
 |
 |
 |
 |
 |
|
 |
Other Cool Stuff→ Past Workshop Photos → 72dpi.com → How-To Articles → Photographer of the Month |
|
Contact Us→ Contact Us → About Us → Site Map |
© 2009-2024 Aperture Academy, Inc.