|
|
|
|||||
Being a successful portrait photographer can be attributed to two parts: bringing out the best of your subject during the photoshoot and optimizing the images after during editing. Aperture Academy’s Perfect Portrait and Processing class combines the best of both worlds—we start with hands on experience in photographing a model, and finish with a well-rounded practice of editing in Lightroom.
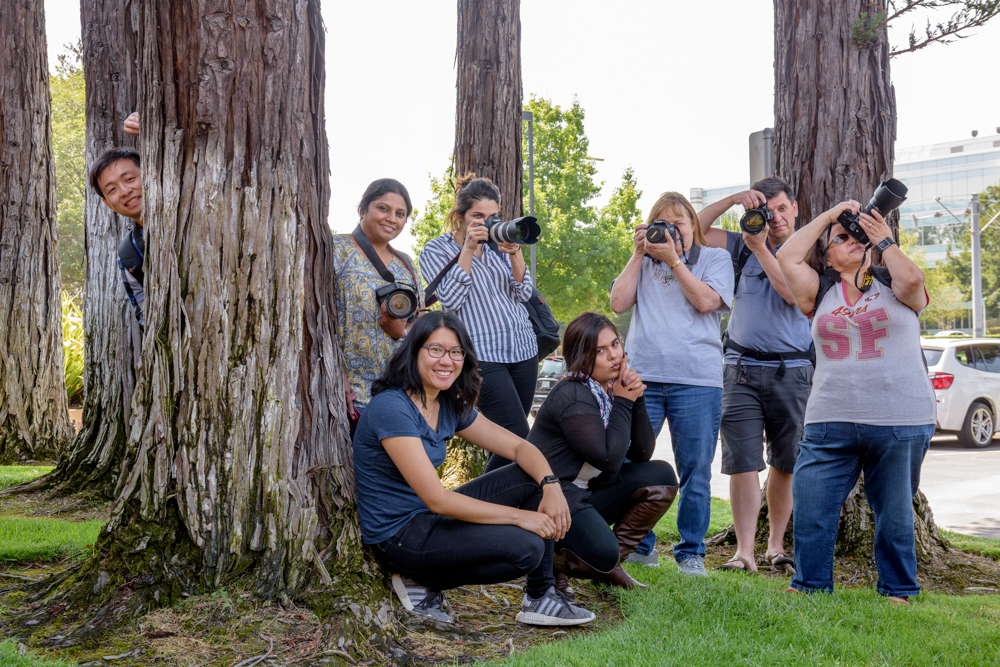
I met with six students at Aperture Academy on an early Saturday morning to enhance their portrait photography and editing skills. I saw a couple of familiar faces as several students had just recently taken our Natural Light class; it was a joy to see that they were back for more! We started off with our initial review of the exposure triangle, type of lenses, focus settings, and composition. Just like the Natural Light class, I reminded the students that practice makes perfect, so we headed outside to do just that.
We did a quick light test with our model Holga. The sun was so bright that she immediately started squinting when front lit—almost like she was winking badly at the group. It was not the most attractive sight and a good lesson on how front lighting was not ideal. We eventually settled on even, indirect light that can only be created by backlighting or being in shade. With lighting on the forefront of our mind, we moved Holga and posed her in areas where the harsh sunlight would not be a problem. I gave the students an opportunity to assess the environment and direct Holga independently. The environment I chose was the quad of the office building—it’s most attractive feature was a fountain that wasn’t even on. Needless to say, it’s not the most ideal place to photograph someone, but the perfect place to learn!
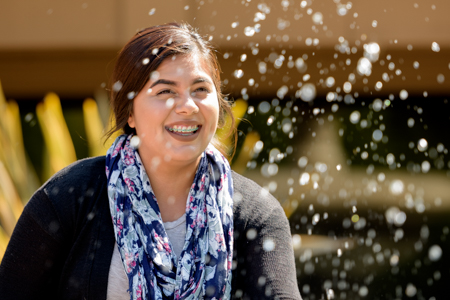
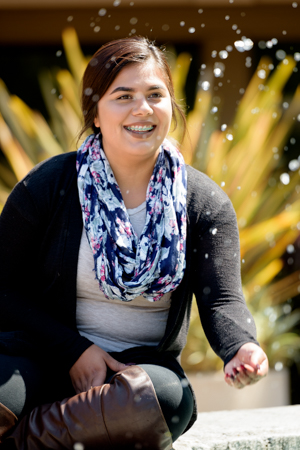
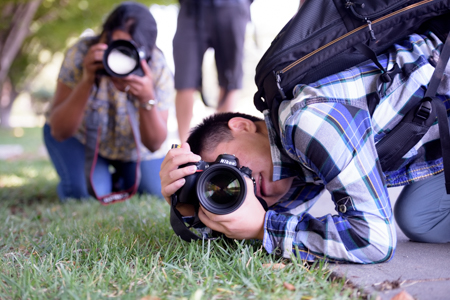 With our telephoto lenses, we were able to minimize most of the background into a soft blur. Then it was just came to positioning. We had Holga learn up against a tree as well as sit on the fountain ledge. One of the students asked her to play with some of the water in the fountain, which turned into a couple of creative candids. I was impressed with improvising the students did, and decided to give them an even harder environment next. We trekked to the back of the office where there was a gazebo covered in vines. While pretty at first sight, it was a pretty tricky environment to photograph portraits in. There was a huge range in exposure—it was extremely dark and shaded under the gazebo, but extremely bright all around it. I showed the students how to create silhouettes or use exposure compensation to expose our subject properly, but the best results came when we framed Holga with a telephoto lens, and used an equally shade area as the background.
We ended our photoshoot with a lesson in framing and dealing with spotty light, and then we headed back inside to edit our photos. With Lightroom, I stressed the importance of downloading photos correctly. So often when students import, they forget that the images are downloading to their computer. In order to avoid syncing issues later, it is important to take the time and choose the destination of the import properly.
 When we came back from our lunch break, the images were all downloaded and ready to be culled and edited. I started off showing the students how to organize their photos by rating. This way, out of the hundred photos we shot, we can focus only on the ones worthy of our attention. We next moved to the develop module of Lightroom to work on some basic edits. We started by turning on our lens correction, and then syncing it to the rest of the photos. We then went on to basic edits: color temperature, exposure, contrast, etc. I demonstrated how the highlights, shadows, whites, and blacks sliders gave the most control, so it is normally where I would start. Afterwards, if I felt the overall photo needed a pop, I would decided to raise the exposure or even contrast. The same message applied for color; instead of just raising the vibrance and saturation, we had our HSL menu which allowed us to change the hue, saturation, or luminance of each color independently.
I then demonstrated a popular trend in editing these days: the fade. While some photographers love this style, others shy away from it. Instead of the traditional high key images with deep blacks and pure whites, we instead pull back on the shadows and highlights with our tonal curve. I had a couple students that seemed to like this technique while others did not—very similar to its polarity in the professional photography world. We then moved on to selective editing using the local adjustment brush. The students were skeptical when I first had them mask, but after showing them a couple of presets to soften skin and whiten teeth, they came around! We ended with creating a virtual copy that could be turned black and white and then exported our images into high quality JPGs. It was a packed day filled with one lesson after another, and although I wish I had more time with my students, it was now up to them to go home and continue growing as a photographer!
Until next time,
Mary and the rest of the Aperture Academy Team
If you'd like to join us at one of our workshops, you can find the schedule/sign up here.
 |
 |
 |
 |
 |
 |
 | |
|
 |
Other Cool Stuff→ Past Workshop Photos → 72dpi.com → How-To Articles → Photographer of the Month |
|
Contact Us→ Contact Us → About Us → Site Map |
© 2009-2024 Aperture Academy, Inc.